Your basket is currently empty!
Dye plants in winter: Dyeing with spruce + how to identify conifers
Whether it's an old Advent wreath or prunings from your garden, you can dye with the needles of native conifers! These evergreen plants are some of the few dye plants to be found in winter (and throughout the rest of the year). Here are my tips for dyeing with spruce.
You could also use the cones for dyeing, but they contain a lot of resin and this can interfere with dyeing. I prefer to leave them for the animals in winter, who eat the seeds inside.
This blog post was actually supposed to appear at the end of January, but then a big coloring project got in the way. And well, maybe some of you still have a dry Christmas arrangement somewhere... And after all, conifer needles aren't only green in winter!
Native conifers
Native evergreens* can be used for coloring: spruce, fir, pine - but please do not dye with yew!
Yew trees are poisonous in all parts except the red seed coat and are also protected in many places.
*Larch would also be suitable, but it loses its needles over the winter.
You will find a few identifying characteristics below.
When to gather conifer twigs?
So far, I have dyed with leftover Christmas greenery or pruning waste. Otherwise, when collecting from wild trees, please take only a little and spread it over many trees.
In late spring, the conifers have new light green growth at the end of their twigs: these are the young shoots that can also be used for culinary purposes, for teas and the like. I wouldn't forage these in particular for dyeing - because they are all the new growth on the tree this year and might be better used culinarily if at all.
Tips for dyeing with spruce
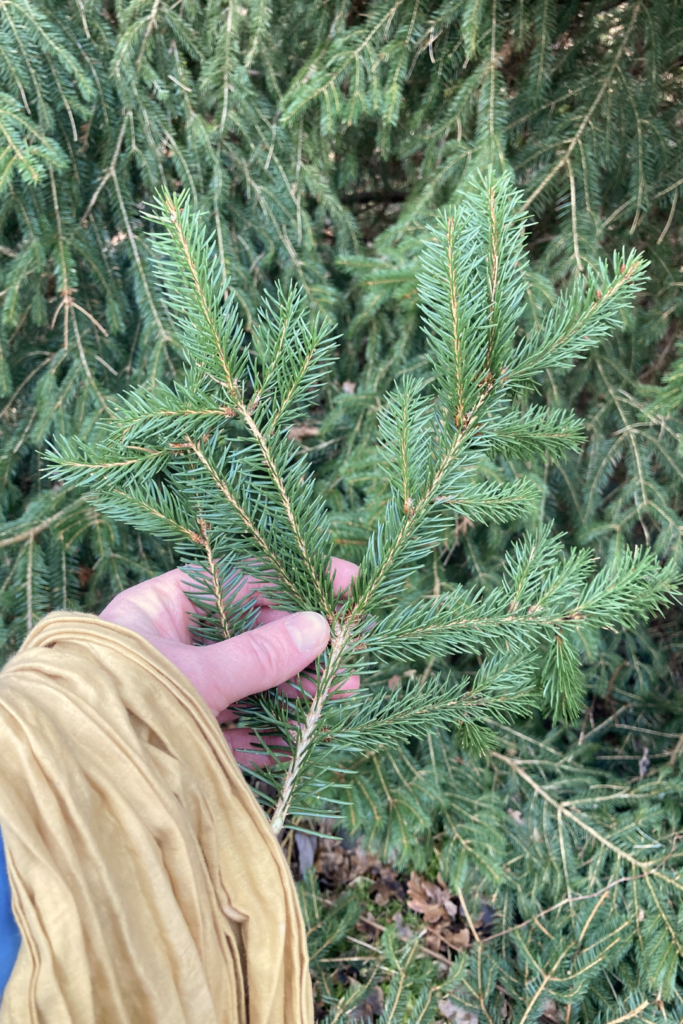
I dyed with spruce branches here. They were still reasonably fresh. I collected them at the end of January from the edge of a path, where they had been clipped recently.
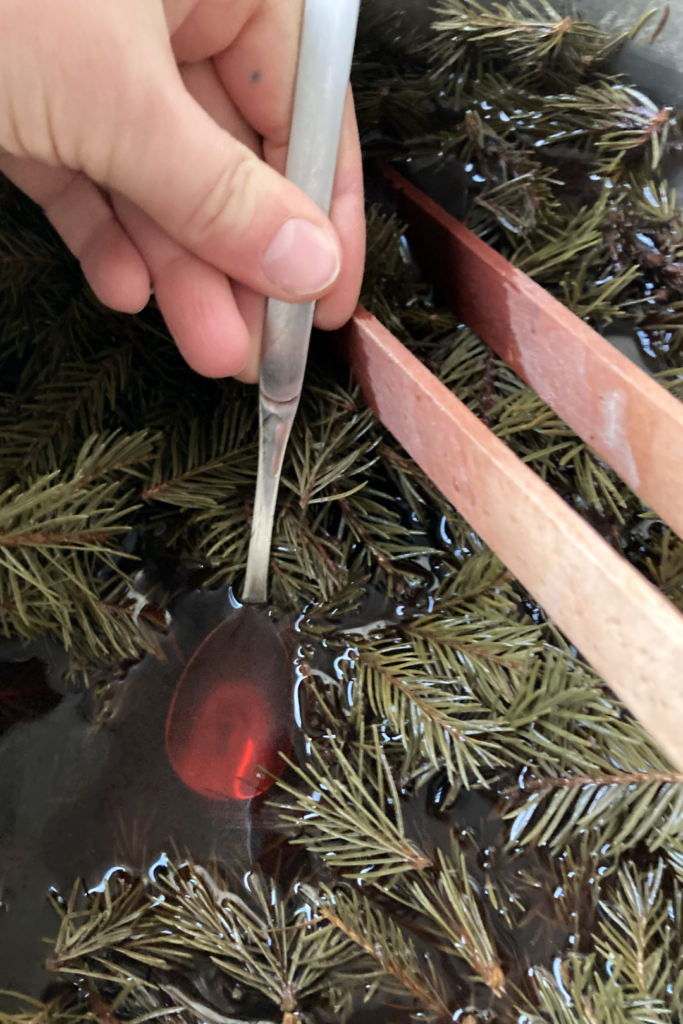
For dyeing with needles, whether from spruce or fir, I plan a slightly longer soaking time. A quick dye extract tends to give pale yellow tones. However, if the pot with the dye bath and needle green is left to soak at least overnight, up to a few days, after heating, the color tone deepens considerably.
I have found that this works even faster with dry needles than with fresh ones. A small amount - like half a teaspoon to 3-5 liters - of washing soda can speed things up even more, which is what I did here.
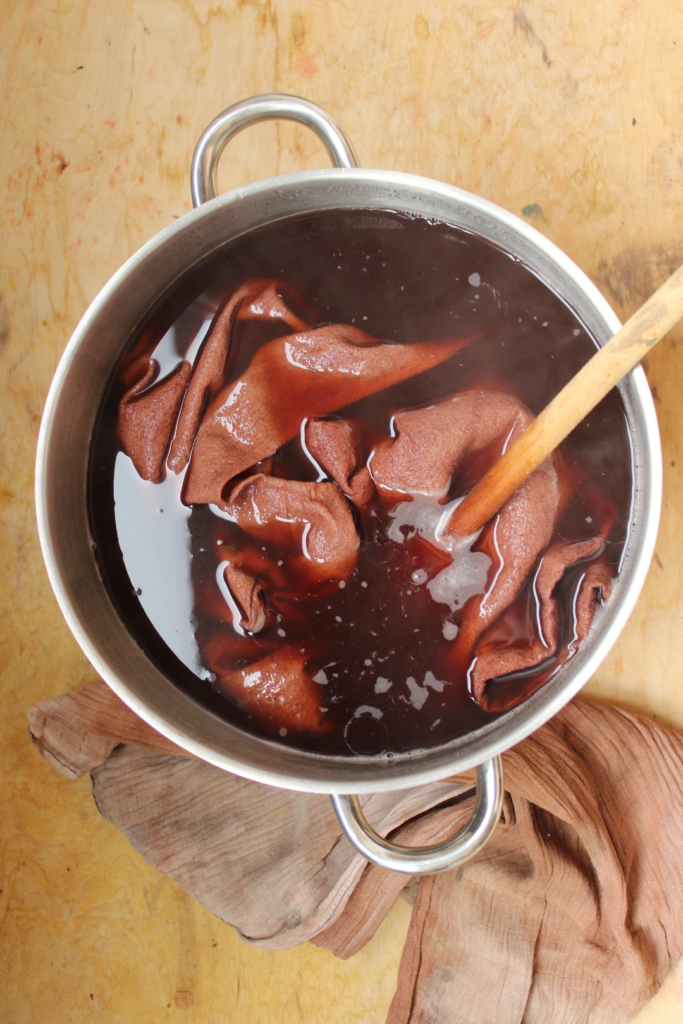
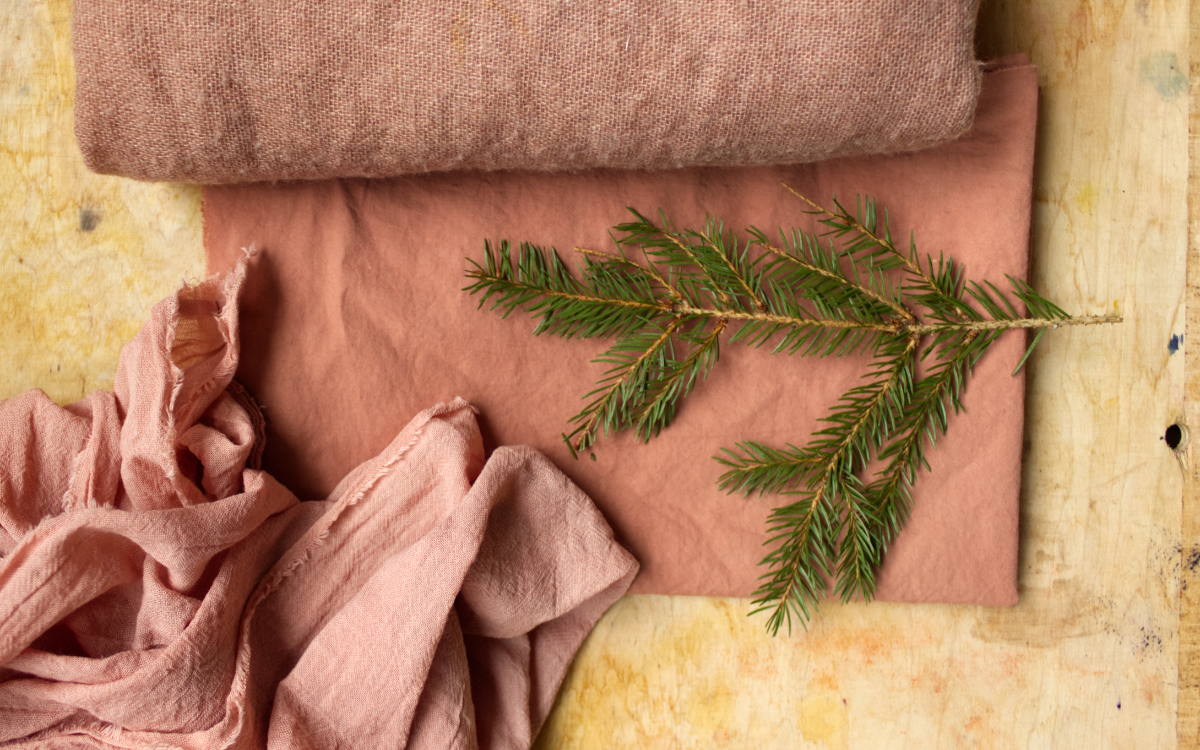
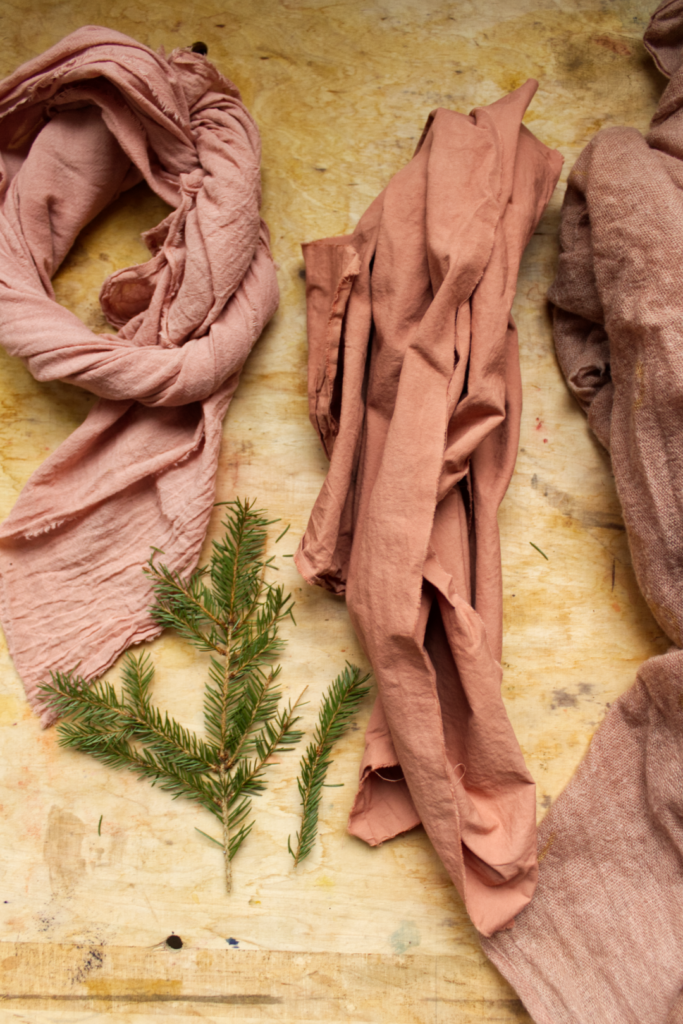
Pre-mordanted fabrics can be dyed in soft to strong shades of old pink. On fabrics without pre-treatment, the color will be significantly lighter.
My dye bath from spruce branches was very productive. I used it three times in a row, first in the winter dyes-1-day workshop and then I continued on my own in the studio. I had about 800g of the fresh twigs (more precisely the needles and thinner twigs, I hadn't even taken the thicker ones with me), and which only just fit in my pot.
The different shades depend on the fiber - I dyed cotton, linen and a light wool scarf here - and on the different pre-mordanting methods.

Post-mordanting with ferrous iron
In addition to many other ingredients, spruce needles also contain tannins. These are interesting for dyeing for various reasons. Among other things, tannins react with ferrous salts to produce muted and even more durable colors.
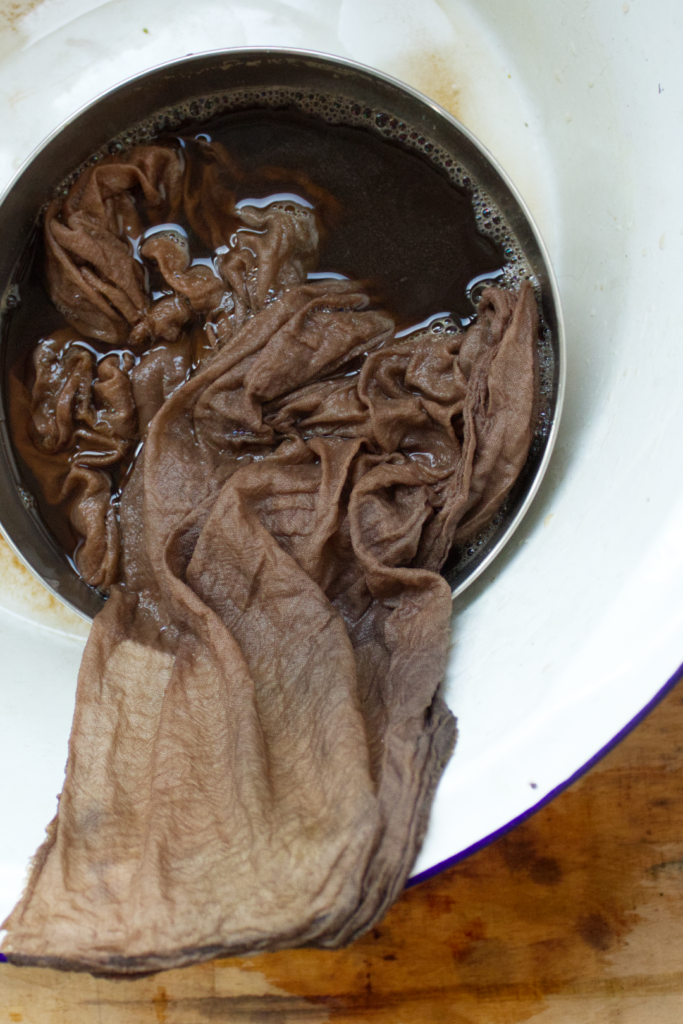
I therefore soaked the cotton cloth dyed with spruce branches in diluted homemade iron vinegar (more on this topic here or in detail in the Online workshop (german) or E-Book).
The result was a warm shade of gray that has a golden shimmer in the sunlight. Very beautiful, and very different from before!

Native conifers and their characteristics
Finally, here are a few of our typical evergreen conifers and how you can tell them apart.
White fir (Abies alba)
The fir needles do not grow all around the branches, but more or less in two lines at the sides, so that the branches are rather flat.
The needles themselves are shiny and dark green on top and have two white stripes underneath. They are bendable and about 3 cm long. Round or notched at the tip.
The fir cones stand upright and disintegrate when the seeds are ripe - ripe intact fir cones are therefore never found lying on the ground.
The bark is white-gray to gray.
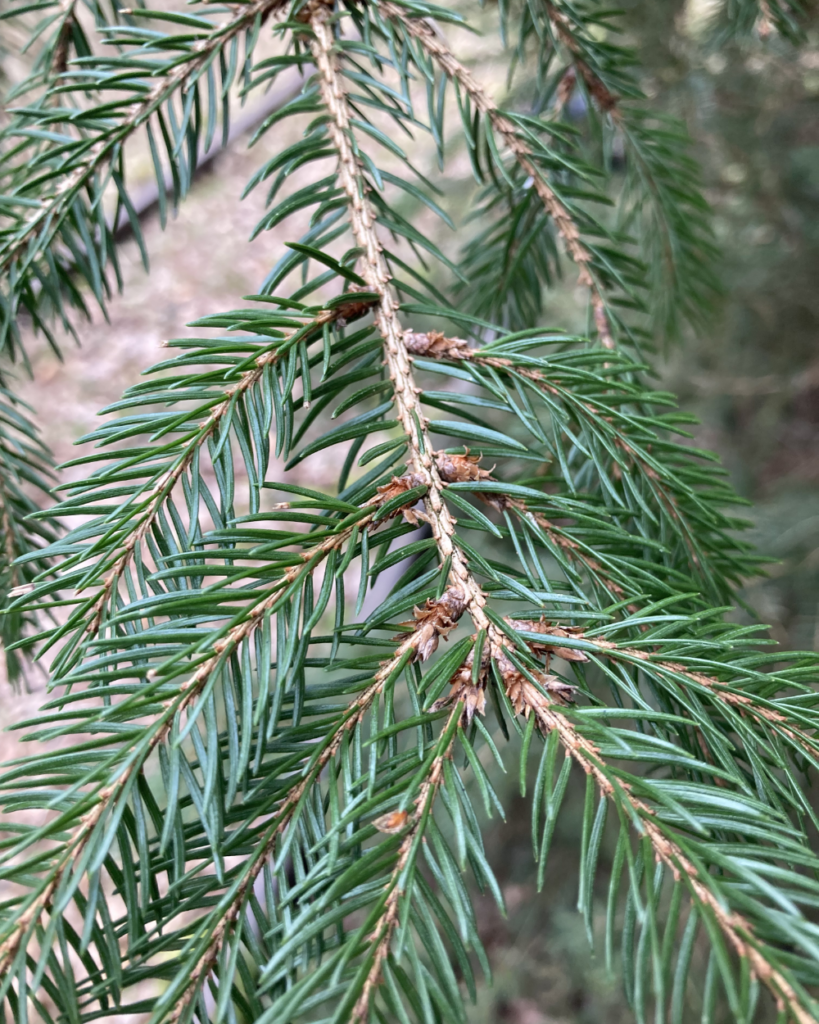
Norway spruce (Picea abies)
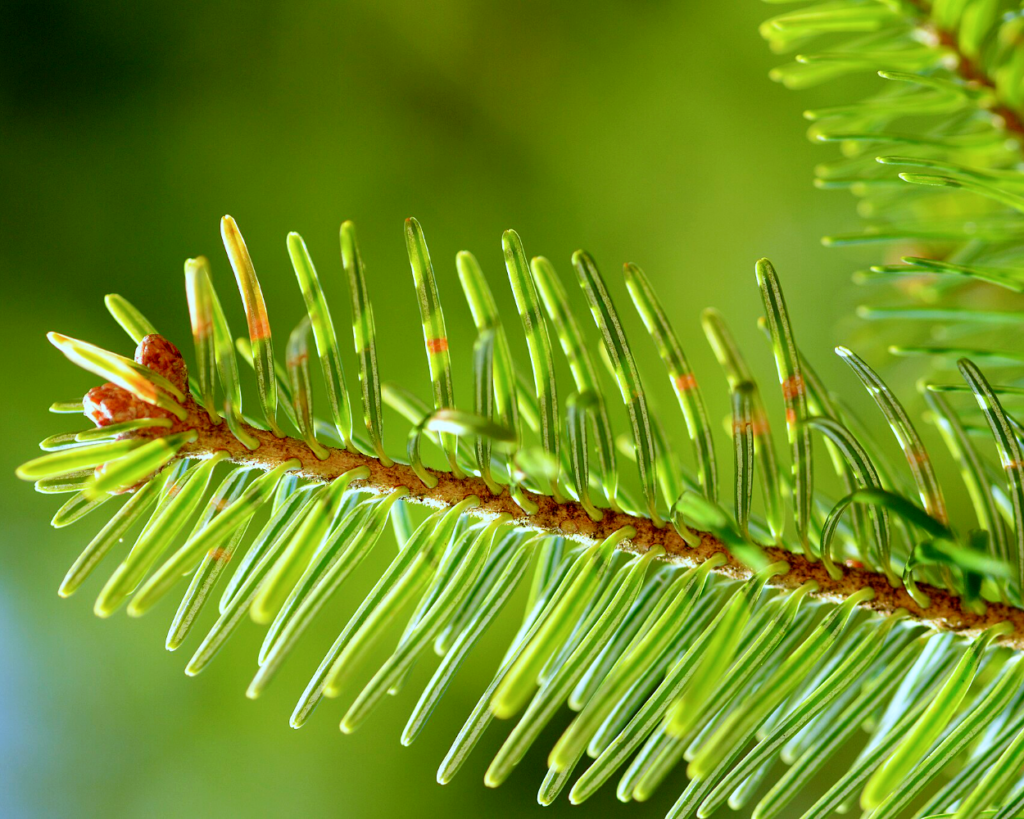
"Spruce pricks, fir doesn't" – 'Fichte sticht, Tanne nicht' is a German saying which rhymes and is a nice memory hook - not all spruces are equally sharp, I have noticed, but the needles are always pointed at the front. The needles themselves are more or less four-edged, stiff and about 2.5 cm long. They have no white stripes and are positioned all around the twig.
If you look closely, you can see that they sit on a 'hump' on the branches.
Spruce cones hang downwards and fall off intact when they are ripe.
The bark is scaly and brown to reddish-brown. In old trees it is often gray-brown.
Incidentally, the oldest tree in the world is considered to be a spruceIt is located in Sweden and has been dated to an age of 9,550 years - more precisely, this spruce consists of four 'components', the youngest of which is 375 years old. Many trees can rejuvenate themselves and the different generations are genetically identical.
European red pine (Pinus sylvestris)
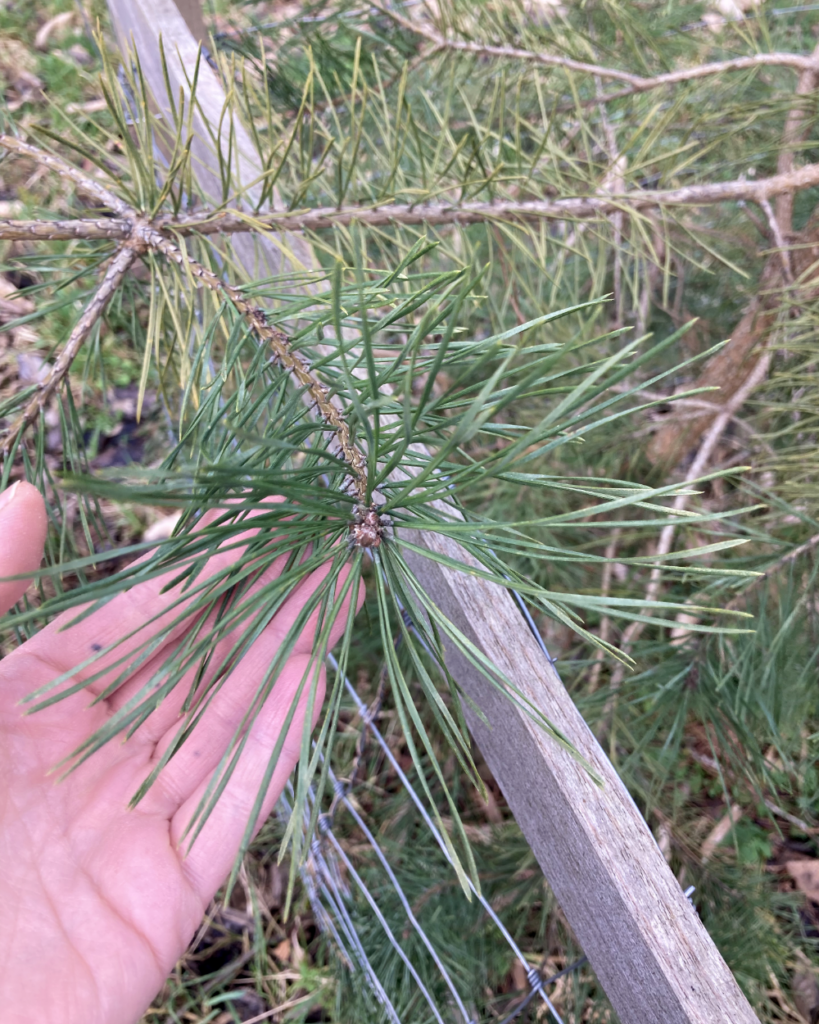
The European red or Scots pine always has two needles that sit together on the branch - all pines have at least this bundle of two, but there are also varieties that have more. (For example, the North American Weymouth pine, which can also be found in our parks and forests, has a bundle of five needles).
The blue-green needles are rigid, usually twisted, 4 to 7 cm long. Pine cones are roundish, shaped like small pineapples, and the cone scales open when it is dry.
The bark is reddish-brown (usually in the upper part of the tree) and consists of large plates from which thin layers peel off.
Douglas fir (Pseudotsuga menziesii)
It actually only belongs here halfway - Douglas firs were only introduced to Europe from North America in the 18th century. On the other hand, the Douglas fir genus only became extinct here after the last ice age, before that it was native here. So everything is somehow relative...
Today, Douglas firs can be found in many parks and gardens in Germany, from where they occasionally spread to the wild.
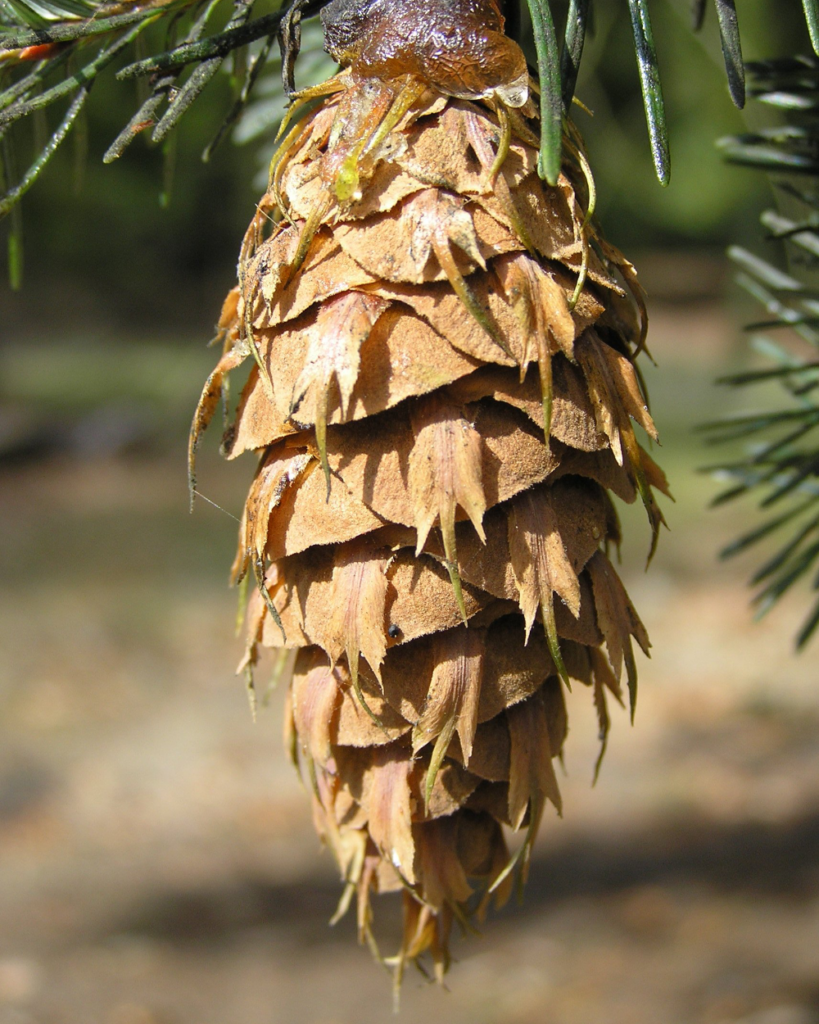
The needles have a great lemony aroma and are therefore particularly interesting for culinary use. They are 2-4 cm long and smell of orange/lemon when crushed. The needles are soft, matt dark green at the top and have two white bands at the underside.
Small three-part tips peek out from under the cone scales, the middle one being the longest.
European yew (Taxus baccata)
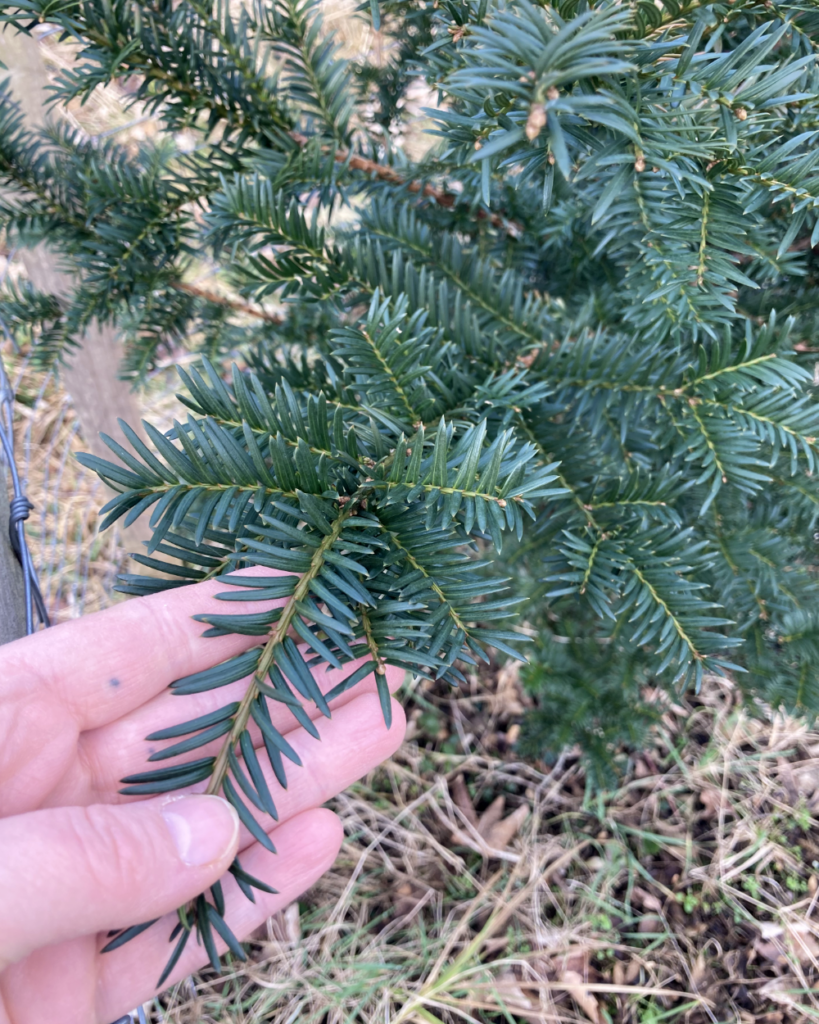
The yew can grow in tree or shrub form. As almost everything on it is poisonous apart from the red seed coat, it is worth learning to recognize it - so that you can safely exclude it. (And it also has an exciting history - its wood is very valuable and has been used a lot historically, and there are many myths about the tree).
The needles are soft and flexible, do not prick, are glossy dark green on top and lighter on the underside. On most branches they are arranged laterally in two rows.
Yew trees are usually dioecious, which means that there are male and female trees. Only the female trees bear the seeds with the typical red fruit coat, which are clearly visible in fall and winter. The flowers on male yews are inconspicuous, small (about 4 mm) but numerous, and round in shape.
Trees are individuals
When I found my spruce twigs, I was a little unsure what exactly I was looking at. The tree was not exactly as described in my identification key.
This often happens when you look closely at plants - on the one hand, language can sometimes be ambiguous or misleading. On the other hand, plants are of course also individuals. Growth forms can vary depending on the location, needles are sometimes more or less spiky, needle lengths are not always as they appear in the book. Even needles on a single tree can look different.
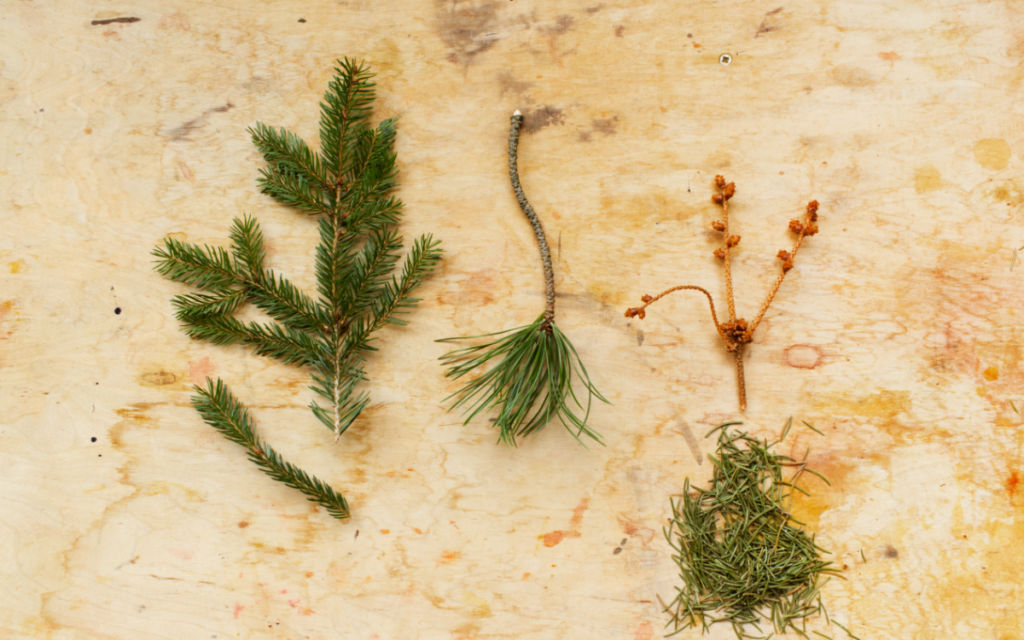
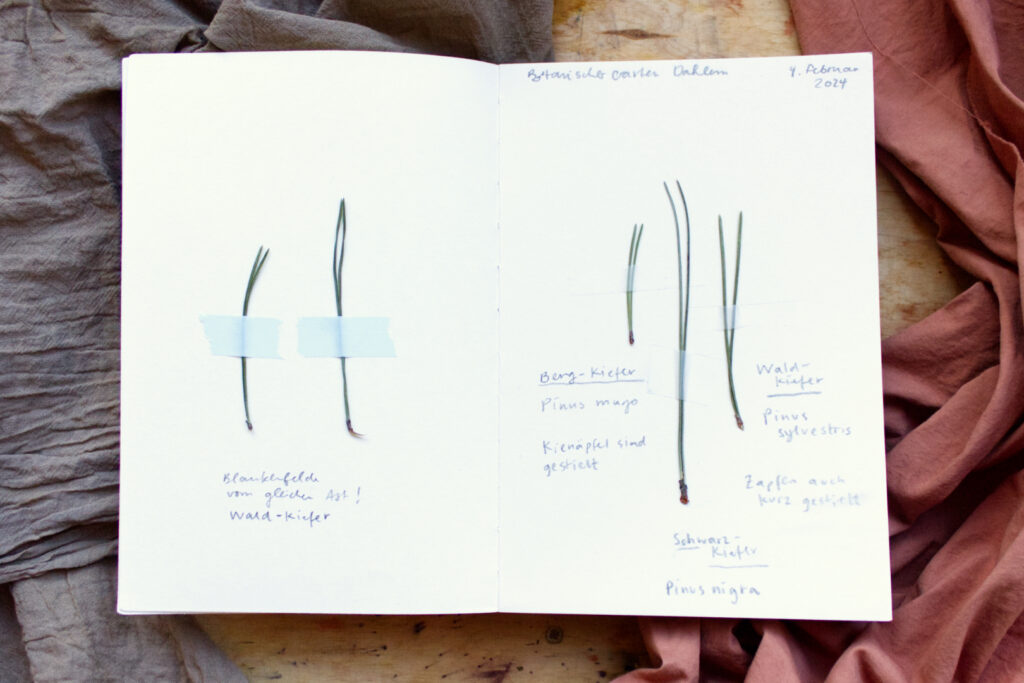
In the picture below, on the right are pine needles from Mountain, Black and Scots pine. On the left are needles from a Scots pine, found on the same branch and quite different in length.
It is therefore worth looking at not just one leaf, but several, and preferably not just one characteristic, but several, in order to get to know plants well.
Identifying trees
Of course, you don't have to identify plants to enjoy them. I just enjoy engaging with them, and recognizing plants (whether under a scientific name or otherwise) is like meeting friends outside. And if you want to collect plants, then I would definitely recommend to learn identifying them, so that you don't take rare or poisonous plants with you. You don't have to study botany to do this - to start with, it's a good idea to concentrate on a few plants and observe them. This trains your eye, and when you feel confident with them, a new plant is sure to arouse your curiosity!
Identification keys
My identification guide for taking outdoors is, as far as trees are concerned Rita Lüders Grundkurs Gehölzbestimmung*.
I also use apps like PlantNet for quick orientation - but on the one hand, I often have bad reception when out and about, and on the other hand, determination via photo can also be very misleading. And unfortunately, I personally don't retain much from looking plants up online. So for me, books on the subject are still very important even in the digital age.
What I like about 'Grundkurs Gehölzbestimmung': You can look for leaf or flower/fruit characteristics, or for the winter condition, depending on the season. The book begins with a detailed section on the general structure of stem plants and the different types of forest in Central Europe - very readable, compact and informative.
This is followed by the determination section, which is structured as a key.
And that means you don't flip through the pages and compare pictures with the plant in front of you, but you systematically go through the characteristics.
Questions are used to work your way forward. For example, in the chapter 'Needle-shaped or scale-shaped leaves':
3. needles evergreen and more or less hard ➝ continue to point 6.
If the answer is no, then: needles fall off in the fall and are more or less thin and soft ➝ continue to point 4 (this brings us to the European larch, Larix decidua.)
On the one hand, it's a bit like solving puzzles, and it's also fun with a group - and I'm much more likely to remember what I learn with this method.
The book is a comparatively simplified key (which is why it is so easy to take with you on the go) and has numerous illustrations, making it very accessible even for beginners. Of course, considerably more comprehensive keys also contain more species. But for my purposes, I'm happy with this one.
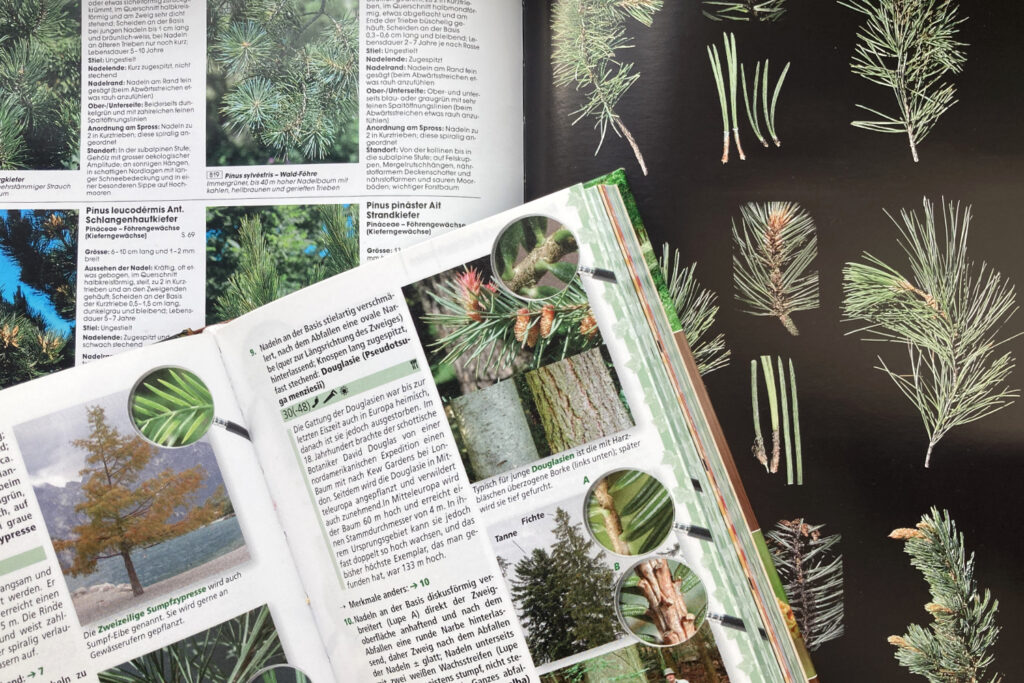
I have another book at home, which I often look into after I returned from a walk.
It would actually be light enough for my backpack, but it has a larger format: Jean-Denis Godets Bäume und Sträucher.* It begins with overviews of common deciduous and coniferous trees, with half a page to a full page of descriptive text and many illustrations. This is followed by identification keys - which do not guide you as clearly as Lüder's book. But I like to look here too, because there are more and larger illustrations. In the key to the conifers there is a top view of the branches, plus a photo of a twig and two more detailed pictures of the needles and needle base on the twig.
Do you use books like these? Can you recommend a book on woody plant identification, or do you prefer to look online for such questions? Please leave your recommendations.
When gathering and dyeing with plants, as always: please be careful and find out for yourself what plants you have in front of you. All information here has been compiled to the best of my knowledge and belief. I take no responsibility for any negative consequences.
Links with an asterisk* are partner links to Buch7Buch7 supports social, cultural and ecological projects - and a purchase via partner links also supports me with a small amount. Of course, this does not change the price of the book.
Comments
2 responses to “Dye plants in winter: Dyeing with spruce + how to identify conifers”
-
Vielen Dank für deinen interessanten Beitrag. Ich werde mir bestimmt mal ein paar Fichtenzweige aus dem Wald mitbringen.
-
Danke für dein Feedback! Vielleicht läuft dir ja auch bald Fichtenschnittgut zu, wie mir auf dem Spaziergang.
-

Leave a Reply